MIT-SCAN-T3
MEASUREMENT OF LAYER THICKNESS ON ASPHALT AND CONCRETE ROADWAYS
The MIT-SCAN-T3 was developed for the nondestructive and precise analysis of asphalt and concrete pavements. Unbound courses of the upper pavement structure (frost protection layer and aggregate base layer) can also be assessed.
The nondestructive measurements are based on pulse induction technology. However, a prerequisite is the installation of a metallic reflector (antipole) of aluminum or steel at the base of the pavement layer to be measured. Layer thickness can be determined directly during paving (self-monitoring) or later as part of control inspections (external monitoring) performed for acceptance of construction work. To take a measurement, the MIT-SCAN-T3 is run over the measuring site. Within seconds, it accurately determines layer thickness. This way, based on a larger number of measuring sites, pavement thickness can be measured extensively and effectively.

COST-EFFECTIVE
- Durable device with a long service life if handled correctly
- Effective control of paving deviations
- Self-monitoring during construction for quality assurance
- Inspections of large stretches within short time

NONDESTRUCTIVE
- Measures by simple run over the pavement surface
- Requires no mechanical coring

PRECISE
- High measurement precision: ±(1 mm + 0.5% of measured value)
- High resolution (800 data points per measurement)
- Exact and reproducible measurement results

FLEXIBLE
- Robust and compact hand-held instrument
- Safe transport in high-quality carrying case (car suitable)
- Measures on hot asphalt, milled surfaces and concrete
- Measures under humid conditions and on wet pavement surfaces
- Measurement with all standard reflectors acc. to the German specification TP D-StB 12

RAPID AND EFFICIENT
- Immediately ready for use
- Without on-site calibration
- Fast and exact reflector location (search mode)
- Without complex search of reflector center
- Automatic plate detection (reflector)
- Measurement including analysis in less than a minute (measuring mode)

SUSTAINABLE
- Without pavement damage
- Mindful of nature and the environment
- Free of emissions
Nondestructive measurement of layer thickness is gaining growing acceptance in Germany, Europe and the USA. Our customers appreciate the reliability, cost-effectiveness and simple operation of our devices.
Compared to other thickness determination methods such as leveling or depth gauging, using the MIT-SCAN-T3 has the advantage that, once set-up, a measuring site can be reused at a later time, e.g. for maintenance and restoration purposes. Besides, electromagnetic thickness measurement does not rely on reference points. Paved layers are objectively demarcated by integrating inexpensive and easy to place metallic reflectors between the layers (base course plus intermediate and surface course). Thickness measurement using levelling acc. to ZTV Asphalt-StB 07 requires e.g. the triple number of measuring points.
Likewise, in comparison with the complex and costly process of coring, the electromagnetic thickness method fares better. In particular the core site, that needs to be refilled after core extraction, entails the risk of being a future trouble spot.
According to the German guidelines for the construction of asphalt roadway pavements (ZTV Asphalt-StB 01), the distance between cores can be increased up to 200 meters. Yet, at least 20 measuring sites have to be assessed. The diagram below shows the high complexity of the coring method compared to nondestructive electromagnetic layer thickness measurement. With the nondestructive layer thickness method, a larger number of measuring sites can be implemented to improve statistics without affecting road structures.
| Measurement accuracy | ± (0.5% of measured value + 1 mm) | |
| Resolution | 1 mm | |
| Measurement range | 15 to 500 mm based on installed reflector type | |
| Asphalt temperature | up to 110 °C | |
| Memory capacity | up to 5,000 data sets | |
| PC connectivity | transfer to MS-Office or accounting program | |
| Power supply | NiMH battery 12V/2Ah | |
| Battery life | 8 hours or approx. 1,000 measurements | |
| Recharge time | 1.5 hours | |
| Dimensions | Device: 40 cm x 26 cm / height variably adjustable up to 145 cm Carrying case 85 cm x 49 cm x 38 cm | |
| Weight | Net weight: 4 kg (device) Gross weight: 18 kg (device, carrying case and accessories) |
The following accessories are available for the thickness measuring devices MIT-SCAN-T2 and MIT-SCAN-T3:

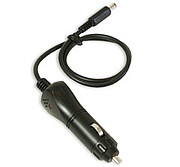
Car power inverter
Local charging at the construction site

Headphones
Acoustic signal output for high ambient noise levels

USB flash drive
Data transfer from device to PC or laptop

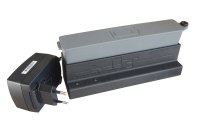
MIT-SCAN-T3 charger & second battery
For external charging of a second battery
Spare battery
Provides 8 hours more operating time, if necessary. For replacement at construction site.

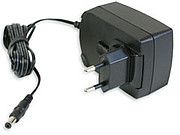
Charging cable
For recharging the device's battery

MIT wheeled spacer
For functionality testing according to TP D-StB 12
Wheeled spacer instructions (PDF)
MIT-Project Software
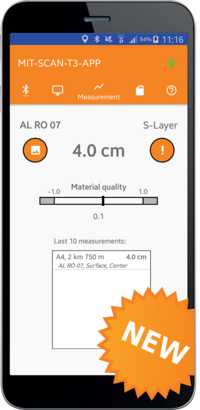
The MIT-SCAN-T3 provides exact and rapid result outputs on the hand-held device's display directly on-site.
MIT's project software additionally offers you a convenient means for later results processing. The program handles measurement data from both two-layered and three-layered road constructions. The software has the following functions:
- Backup and archiving of data on a PC (data transfer via USB storage device)
- Correction of measurement location specifications (designation of construction site, kilometrage, layer)
- Control of measurement points (GPS)
- Generation of form sheets acc. to TP D-StB 12 for selected data sets
- Preparation of measurement site lists that the device uses for upcoming measurements
MIT-Evaluation Software
MIT-ProAsphalt is designed to evaluate and calculate whole projects in compliance with the German standard ZTV-Asphalt. Unfortunately at the moment, an English version is not available.
![[Translate to EN:] MIT-ProAsphalt [Translate to EN:] Verpackung MIT-ProAsphalt](/fileadmin/_processed_/9/6/csm_MIT-ProAsphalt_Schuber_b588ccd2cc.jpg)


Your contact:

Thickness measurement support
Mrs. Andrea Ulbricht
Phone: +49 (0)351/87181-25
Send an email


